机房扩容好硬盘后,进入机器开始操作命令扩容,具体步骤如下:
列出您的 SCSI 设备的名称,重新扫描SCSI:
[root@bs3-mangodb-3 ~]# ls /sys/class/scsi_device/
根据本机器展示的SCSI设备名称,重新扫描SCSI
[root@bs3-mangodb-3 ~]# echo 1 > /sys/class/scsi_device/0:0:0:0/device/rescan
[root@bs3-mangodb-3 ~]# echo 1 > /sys/class/scsi_device/3:0:0:0/device/rescan新建分区
[root@bs3-mangodb-3 ~]# fdisk /dev/sda
Welcome to fdisk (util-linux 2.23.2).
Changes will remain in memory only, until you decide to write them.
Be careful before using the write command.
Command (m for help): p (查看已分区数量 有两个/dev/sda1 /dev/sda2)
Disk /dev/sda: 644.2 GB, 644245094400 bytes, 1258291200 sectors Units = sectors of 1 * 512 = 512 bytes Sector size (logical/physical): 512 bytes / 512 bytes I/O size (minimum/optimal): 512 bytes / 512 bytes Disk label type: dos Disk identifier: 0x000b61c1
Device Boot Start End Blocks Id System /dev/sda1 * 2048 2099199 1048576 83 Linux /dev/sda2 2099200 1048575999 523238400 8e Linux LVM
Command (m for help): n (新增加一个分区) Partition type: p primary (2 primary, 0 extended, 2 free) e extended Select (default p): p (分区类型选择为主分区) Partition number (3,4, default 3): 3 (分区号选3) First sector (1048576000-1258291199, default 1048576000): Entre(回车,选择默认起始扇区) Using default value 1048576000 Last sector, +sectors or +size{K,M,G} (1048576000-1258291199, default 1258291199): Entre(回车,选择默认结束扇区) Using default value 1258291199 Partition 3 of type Linux and of size 100 GiB is set
Command (m for help): t (t修改分区类型) Partition number (1-3, default 3): 3 (选分区3) Hex code (type L to list all codes): 8e (修改为LVM(8es就是上面p选项查看到的id)LVM是 LogicalVolume Manager(逻辑卷管理) Changed type of partition 'Linux' to 'Linux LVM'
Command (m for help): w (保存) The partition table has been altered!
Calling ioctl() to re-read partition table.
WARNING: Re-reading the partition table failed with error 16: Device or resource busy. The kernel still uses the old table. The new table will be used at the next reboot or after you run partprobe(8) or kpartx(8) Syncing disks. [root@bs3-mangodb-3 ~]# partprobe (重新加载分区表)对新增加的硬盘进行格式化
重新加载分区表后格式化分区:mkfs.xfs /dev/sda3 (sda3是刚才分的区,另外注意:格式成什么文件系统要使用df -Th命令先查看你当前linux系统使用的是什么文件系统,我这边看到的打印内容是:
添加新LVM到已有的LVM组,实现扩容
[root@bs3-mangodb-3 ~]# lvm (lvm 进入lvm管理)
lvm> pvcreate /dev/sda3 (初始化刚才的分区)
WARNING: xfs signature detected on /dev/sda3 at offset 0. Wipe it? [y/n]: y (输入y确认)
Wiping xfs signature on /dev/sda3.
Physical volume “/dev/sda3” successfully created.
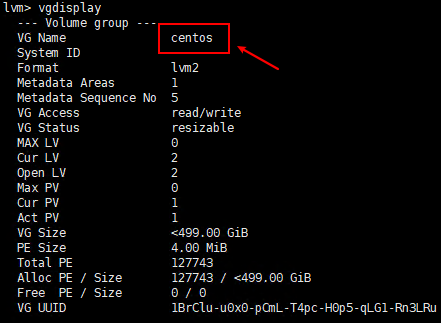
lvm> vgdisplay (查看卷组(Volumegroup)名称)
lvm> vgextend centos /dev/sda3 (将初始化过的分区加入到虚拟卷组centos)
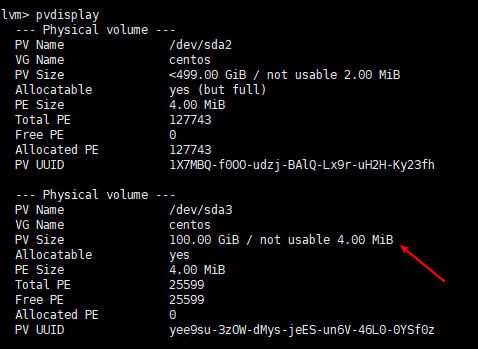
lvm> pvdisplay (查看物理卷(Physical Volume)情况,可以看到新加的100G物理卷 )
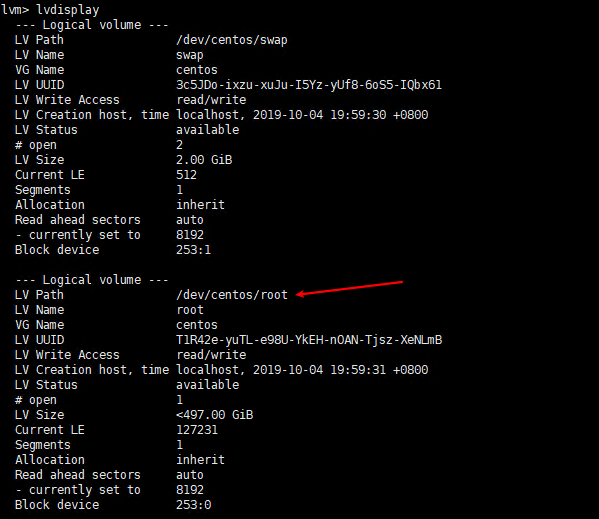
lvm> lvdisplay (查看逻辑卷(Logical volume)信息)

lvm> lvextend -L +99.99G /dev/centos/root (增加物理卷到逻辑卷根目录,从上面逻辑卷信息的打印信息中可以看到逻辑卷根目录是为:/dev/centos/root )(扩容了100GB 这里只增加了99.99GB.因这个显示的100GB,不等于完整的100GB存在换算问题,当填写100GB时会提示空间不足无法扩容)

lvm> quit (操作完逻辑卷扩容后退出lvm)
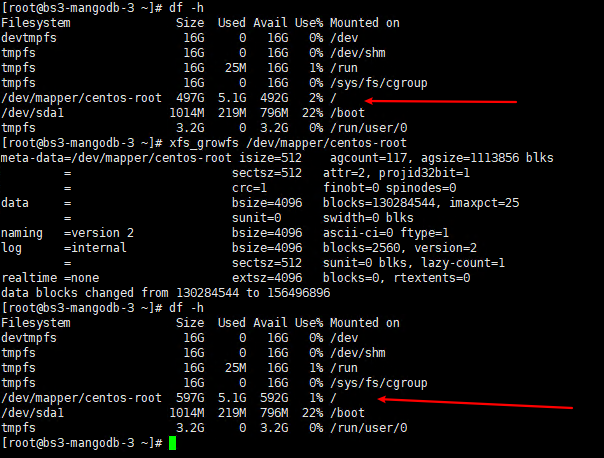
以上只是卷扩容了,下面是文件系统的真正扩容,输入以下命令:
[root@bs3-mangodb-3 ~]# xfs_growfs /dev/mapper/centos-root结果查看 扩容前后对比
